How to Setup your Hardware Wallet on MyEtherWallet or MetaMask
In this article, you will learn how to store your ERC-20 coins safely and securely with your hardware wallet on MyEtherWallet or MetaMask.
So let’s begin by understanding why you might need an ether wallet to store your coins. More than likely you already bought a coin on Coinbase or Binance and looked to withdraw it from the crypto exchange and into your hardware wallet, only to find out that your coin isn’t supported on your wallet.
With a little bit of research, you found that you can store your coins on an ether wallet like MEW or MetaMask. The most secure way of setting this up is with a hardware wallet, though you can store your coins on these wallets without using your hardware wallet. Ledger and Trezor are both compatible with both software.
The reasons why you should have an Ethereum wallet are that they allow you to read your balance, send and receive transactions on the Ethereum blockchain. An ether wallet is an essential tool for sending funds and managing your ETH.
Now let’s get you set up!
Setting up on My Ether Wallet
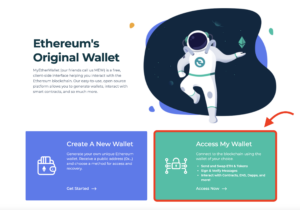
Step 1: Go to the official MyEtherWallet website https://www.myetherwallet.com/
Step 2: Click “Access My Wallet”
Step 3: Click on “Hardware”
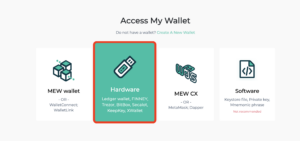
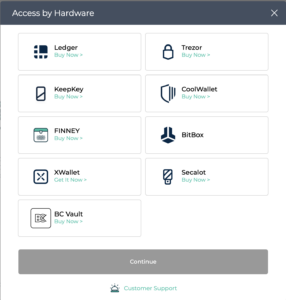
Step 4: Choose your hardware wallet and press continue.
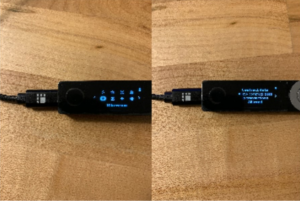
Step 5: Open the Ethereum app on your hardware wallet, go to settings and allow contract data to be displayed.
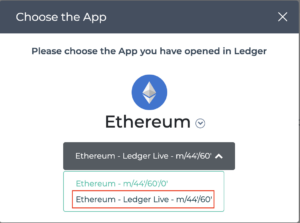
Step 6: Make sure you choose the right path. I’m using ledger live here.
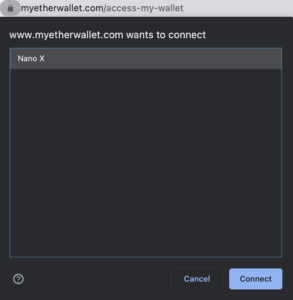
Step 7: A prompt will pop up (Chrome), press connect.
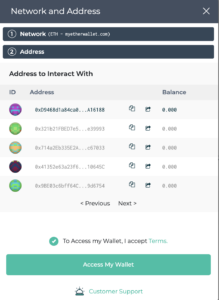
Step 8: Select a public address, accept the terms, and click “Access my Wallet”.
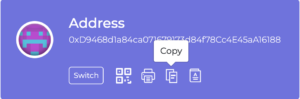
Step 9: You have now linked your hardware wallet with MyEtherWallet! Now you are able to see your coin balances, send and receive ERC-20 tokens.
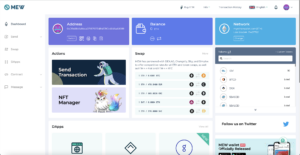
Make sure to send your assets to the proper address! Click the copy button just below your new address to make sure that you send your valuable tokens to the right place.
Setup your crypto hardware wallet with MetaMask
Step 1: Download MetaMask extension for browser here https://metamask.io
Step 2: Create an account by setting up a new wallet and password.

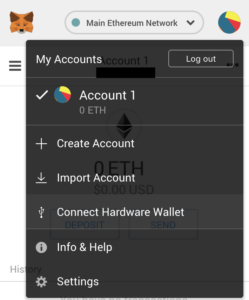
Step 3: Once you have your account setup, go to settings and select “Connect Hardware Wallet”.
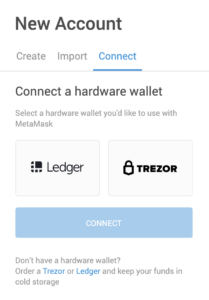
Step 4: Again, select your hardware wallet and the right path (Ledger Live).
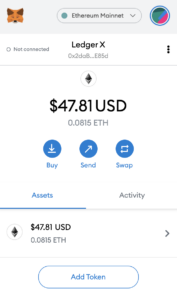
Step 5: You are now connected to MetaMask!
You now have all the information necessary to store your ERC-20 tokens safely and securely on your hardware wallet.
If you’re curious which is the best hardware wallet, check our our comparison of Ledger vs Trezor hardware wallets.